Light Trails — Creating cool effects with flash and camera movement
Now I’ve found a good lighting diagram tool on the web, http://lightingdiagrams.com, I’m planning to write a series of posts that describe how I made an image and in particular how I lit it.
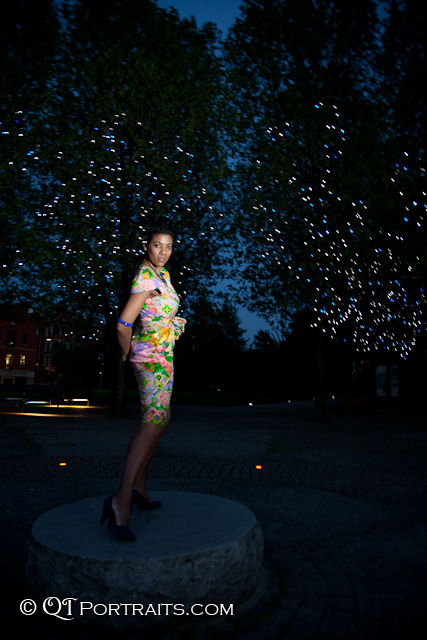
This article is the first such post and I’m going to start off really, really simple with the light-trail image I made on one of my twilight fashion shoots earlier in the year.
This is just about as simple as it gets when starting to add flash to light an image and the whole this was made from a single exposure, a single flashgun mounted on a light stand and a radio trigger. I did add a little spice though in the way that I created the background effect but I’ll explain how I achieved it and also why it works below.
So, how was it done?
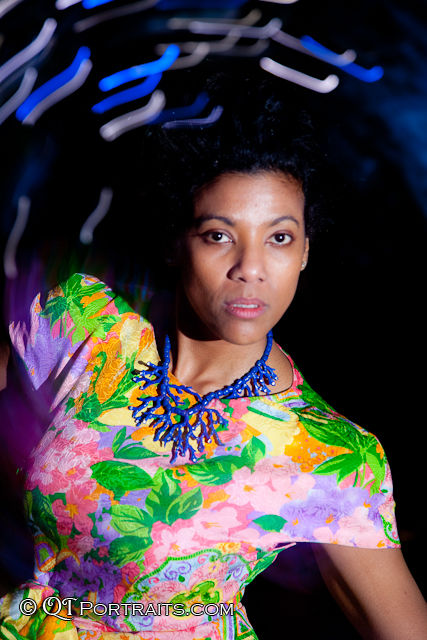
It’s actualy extremely simple and all I did was to set up a Canon 580exII Speedlite on a stand off to camera right. The light was positioned to give me the loop lighting pattern on the models face. I’m not going to explain lighting patterns in any detail here, but to create loop lighting a directional light source is positioned relative to the subject’s face in such a way that it will form a shadow, cast by the nose, in the shape of a loop. The key here is to remember that the light is positioned relative to the subject, not the camera! If you look very carefully you’ll see that there is actually a flaw in my light setup. The Speedlite is actually too low causing the nose shadow to angle upwards instead of down.

The lighting diagram seen here shows how the shot was set up. As I said, this really is about as simple as it gets. I just used a single light source (if you disregard the lights in the background), in this case the Canon 580exII and triggered it using the PocketWizard MiniTTL/FLexTT5 radio trigger system.
Setting the Exposure…
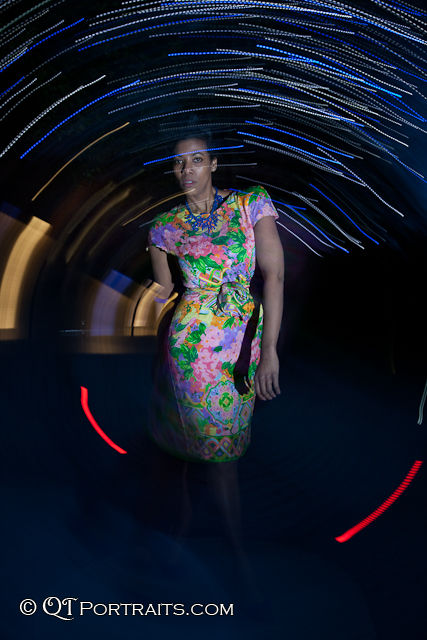
When I first came across this scene I saw a great opportunity for making a good image but my initial tests proved quite dull and uninteresting as you can see from the next image. Not the model, Marissa, I hasten to add 😉 But all those fairy lights were just asking to create a more abstract background by dragging the shutter.
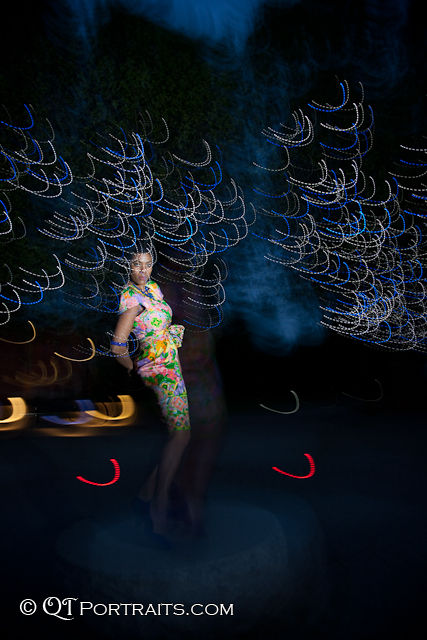
The exposure was a guestimate and dialled in manually based upon the backgound illumination with the flash just lighting the model. I needed a realtively slow shutter for the background lights to register in the frame so set the aperture wide open to f4 and guessed at 1/4″. Firing off a test shot yielded the image above. Any faster than 1/4″ and they would have been too dark but at this speed you can see movement blur in the lights but this wasn’t a problem as I planned to move the camera during the shot anyway.
Why isn’t the model blurred?
Well, the flash duration is in the order of microseconds so moving the camera during the exposure wasn’t going to be an issue provided the shutter speed wasn’t too slow that the ambient light reflected from her would contaminate the image. The next image illustrates this to good effect. The shutter speed was set to 1 second and you can easily see the ghosting that surrounds Marissa. She was frozen by the flash impulse but at 1s with an aperture of f4 there was still enough ambient light being reflected from her to contaminate the image. Clearly 1″ was way too slow and in the end I settled on 1/4″ @ f4.
With the exposure set for the background it was time to dial in the flash power on the Speedlight. I had the flashgun set to manual and picked my traditional starting power of 1/8. It was then just a case of take a frame, chimp the back of the camera and if the subject is too dark, up the power and vice versa. With the background exposure set, the flash power dialed in and the light in the correct position (albeit too low) we were good to go.
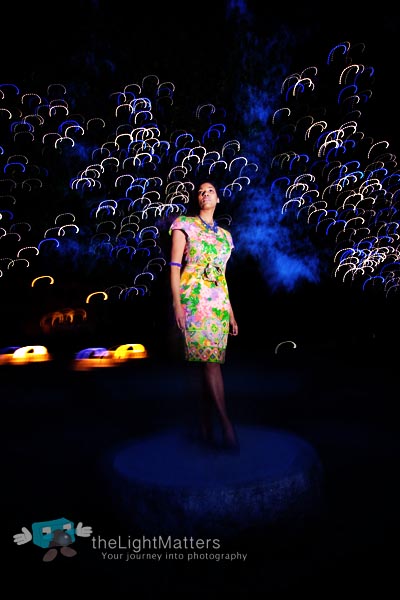
I tried several exposures, sometimes moving the camera, sometimes rotating it and finally settled on the image at the top of the post as my favourite. I’ve included a couple of these below but they are straight off the camera and until the first image haven’t had the benefit of being fully developed yet.