What is ISO? How to set it correctly on your camera

Camera Sensor ISO Setting

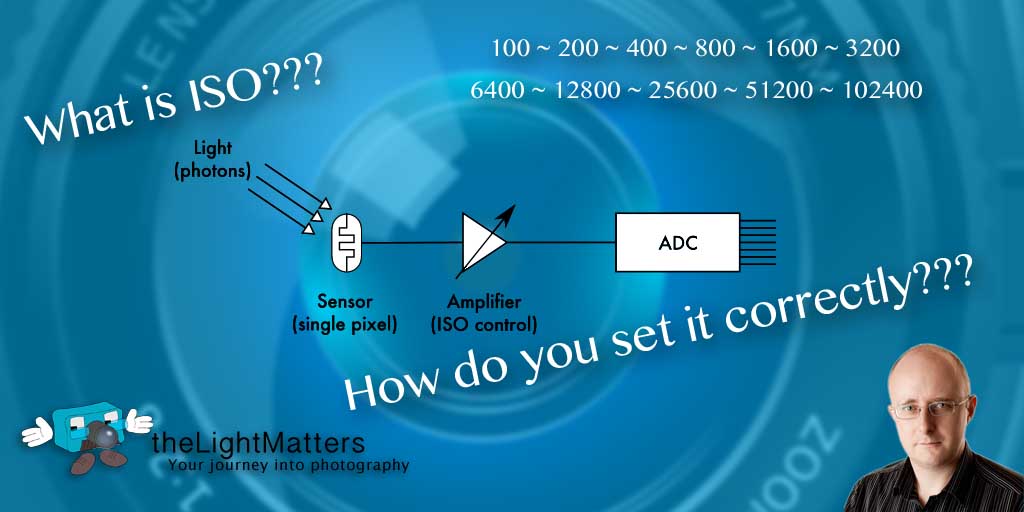
What is ISO on a camera?

ISO is a scale of numbers that refer to your camera’s sensitivy to light. They usually start at ISO100 and increase from there to ISO25600 and even higher. Following the megapixel wars of the Naughties, the leading camera manufacturers turned their attention to ISO. We’ve since seen some incredible advances in sensor technology with some cameras now able to record images in near total darkness.

The general rule of thumb for ISO is the higher the number, the more sensitive your camera is to light. Doubling the ISO doubles the sensitivity and increases the exposure by 1 stop but not without a cost. As the ISO increases so does the noise in the image. Set your ISO too high and you’ll either have to Continue reading What is ISO? How to set it correctly on your camera »

Technique: How it was done… Battery Shot

Setup for the Battery Shot

I have a couple of questions about how I did the battey shot in this post so thought I’d post the lighting setup in the form of the sketch above. It’s a very simple technique and took about 5 minutes to do.

The foundation for the set was a sheet of black corrugated plastic upon which I sat my camera bag to act as a black background. I then roughly positioned two 580EX II speedlites, the one to camera left standing up on its penguin feet and the one to camera right laying down on its side. Both were fitted with Pocket Wizard triggers. I’d originally planned to use the window light to light the set with the speedlites just adding a cool effect to represent the concept of power. In the end I elected to use the ambient just as fill with the main illumination coming from the speedlites bouncing into a silver reflector.

I’ve repeated the final image after the jump for those that are interested. Continue reading Technique: How it was done… Battery Shot »

Quick Tip: Packing Some Power

Packing Some Power - 24 AA Batteries
Packing Some Power - Spare AA Batteries

I do a lot of strobist work out on location and really enjoy it. One thing that is a real bind is battery management and how to pack them in your kit bag so you know which ones are which when it comes to using them. This quick tip explains how I go about it.

The image above is, for me, part of the solution. I simply use an old, plastic business card box with dividers made from some of the old cards. It’ll comfortably hold 24 AA batterie, enough for 2 spare sets with 3 speedlites  or 3 spare sets with 2 speedlites. This is more than enough for me as I’ve never depleted more than two sets per flash gun and only then because I was in a dark nighclub.

The dividers keep them together in their sets of 4 and depending on which way up I put them I can immediately tell if they’re charged (positive end up) or depleted (negative end up). They’re only used in my speedlites so its really easy to maintain the grouping – they’re either in the box, in the speedlite or in the charger but just in case I do also number them as I mentioned in this post on Battery Management I wrote a while back.

There are commercial solutions to keep batteries together but I like this quick tip. It’ a nil cost solution made from something I already had lying around the house.

How a Non-Destructive Workflow Can Lead to a Happy Client

A long time ago I adopted the policy of making all my edits in Photoshop non-destructive fo rthe simple reason that I could easily go back and change something if I needed to. This slowed me down at first but as I became more adept at wielding a stylus and graphics tablet, and through the benefit of actions, experience and perseverance it is no longer true. Using the right tool for the job is also a huge help and my workflow consists of a mixture of Lightroom and Photoshop.

Earlier today I embarked on a retouch session. Nothing spectacular about that as it happens all the while. What mad this one all the more important though was that my client was off on holiday this afternoon and needed the images before she went. Continue reading How a Non-Destructive Workflow Can Lead to a Happy Client »